

General
General FAQ
How do I go about gluing a puzzle?
Gluing your finished jigsaw puzzle is a great way to save your finished work and display a work of art that you can be proud of for years to come. Today, we'll show you how to do it yourself!
- It transforms puzzle into one seamless piece!
- It showcases your long hours of dedicated work!
- It provides a topic of conversation for those inclined to do so.
- It creates, a brand new, original piece of art, right there, in your own home.
- Gluing jigsaw puzzles is fun and very affordable and very easy to do.
Ready to Get Started Gluing your Jigsaw Puzzles?
First things first, pick a puzzle… any puzzle! Actually, pick out a puzzle that you enjoy looking at time and time again! Your choices are endless. A larger puzzles, something around 750to 1000 pieces is great for a framed wall piece – but you can do the same thing with smaller 100 to 500 piece puzzles too!
Don’t forget to buy your jigsaw puzzle glue! We have several types of glue here at Puzzle Warehouse – and there are even more out there, including spray-on and powder – but we prefer liquid glue – since there is no preparation and it’s easier to apply. We like SunsOut puzzle glue because it goes on white like Elmers glue but dries totally clear. This allows you to see where you have spread the glue more easily than with clear glue.If you do use powder glue (some brands like Educa provide powdered glue with puzzles over 500 pieces) just make sure you mix it according to the instructions and it should work just great! You want a glue that seals clear, solid and strong. If possible, choose glue made by the same manufacturer as your puzzle. Glue packaging will indicate the size and number of puzzles it will cover.
Gluing your puzzle is easy! Here’s our quick tip sheet on how to do it!
Start by completing one of your favorite puzzles. Smooth it out and make sure that all the pieces fit together nicely! Next, get some wax or parchment paper and carefully slide it under your completed puzzle. (Make sure to leave an extra inch or so all the way around.) A second set of hands can be helpful to hold the puzzle in place while you work the wax paper underneath. (The whole point of this maneuver is to protect your table from excess glue that may or may not seep through the puzzle piece cracks!) Click here for information on how to frame a jigsaw puzzle.
Once the wax paper is under the puzzle use a rolling pin to make sure the entire puzzle is as flat as you can get it and you’re ready to spread the glue! The easiest way to glue your puzzle is to actually pour the glue right on top of the puzzle and then use a piece of cardboard or a business card to spread the glue around. There is typically a brush attached to the bottle cap and you will use that to spread the glue along the edges of the puzzle.
You will want to make sure that you cover all of the pieces. Don't miss any!Once you have started, continue until you have finished. In other words... don't stop half way through to answer the phone. As long as you are covering everything completely, don't worry too much about the immediate look. You may notice some small air bubbles throughout, but these will normally shrink as the glue dries, leaving a nice even finish. Just be careful not to brush or sponge on too much glue at once – it is possible to over saturate the puzzle causing it to swell or peel.
Make sure to let your puzzle dry thoroughly before handling it! Some glue will take up to 4 hours to bond, seal and dry, but in most cases it is ready to be moved in about 2 hours. After drying, you should be able to pick up your puzzle - this time in one piece! Once it is dry you can use a ruler or spatula to separate the paper from the puzzle.
Now you may say, "How can I hang my puzzle on the wall?"
The best way to display your puzzle once it is glued is to mount it on a backer board. Why use backer board? If you try to hang it after just gluing, there is a good chance pieces will fall out with time. A somewhat rigid backer board will help prevent your puzzle from warping!You have two choices for mounting:
Method #1
We generally recommend you find a locally Hobby Lobby, or a similar craft store, and ask them to do a “Dry Mounting” Basically they use a special piece of backer board that has heat sensitive adhesive that will glue your puzzle to the board instantly. Our local store only charges $12-15 to mount a 1000 piece puzzle.
Method #2
Do it Yourself. Purchase a piece of 1/4” foam board from your local hobby shop and while there also purchase spray adhesive and a razor blade if you don't have these already. (DO NOT try to use puzzle glue or any other kind of liquid glue unless you are going to mount it in a frame. We have tried many different types of glue and the liquid glues usually cause the board to warp due to the glue not drying evenly.)
Next position your glued puzzle on the backer board and draw an outline with a pencil. Make sure to mark your line, ever-so-slightly, just inside of your puzzle dimensions. This will help "hide" your backer board, allowing only your puzzle to be seen! It will also prevent further trimming later on. This is an important point because you definitely do not want to try and trim the foam once it has the puzzle glued to it.
Now, simply cut out your board. A straight edge (ruler) and a razor blade work best with the foam board!
The next step is to glue your puzzle to the backer board and because you are using a spray adhesive we recommend you do this in a ventilated area. Personally I spread newspaper out on my garage floor and spray the glue on the foam board. Now you are ready to apply the puzzle to the board and once again it is easier if have a second set of hands to help you get it centered just right. (Keep in mind that the spray adhesives dry much quicker than the liquid glues, so read the can to see how long you have before the glue sets.)
Once you have it laid down on the board, get your rolling pin and roll over the whole puzzle to make sure it bonds well to the board. Depending on the size of your puzzle, you may need to apply some weighted objects to ensure that the puzzle "presses out" nice and flat on your board! A stack of some good old heavy books will work just fine!Now, once again, let your puzzle dry completely!
Time to Hang It Up! There are two methods you can use to hang your puzzle.
Method #1
(Can be done after the puzzle has already been mounted to the board) You can purchase 3M Picture hanging strips from us or from Home Depot. (These are in fact what we use to hang all the puzzles in our retail store.) One package will suffice for a 1000 piece puzzle or less. Because they are Velcro you can easily reposition them to get it level and you don’t have to put holes in your wall. You can see why we use this method.
Method #2
(Must be done before the puzzle is mounted to the board) You can purchase 20 gauge craft wire from your local hobby store and make a traditional wire hanger with your board. Start by cutting or punching two (very small) holes: one on each side of the board, a few inches from the edge and roughly halfway down from the top!Using a thin wire push it through one hole and run it with some slack down to the other hole and back out. (You are making a traditional picture frame wire mount.)
Next, ,tie a small knot at the end of your wire and gently pull until the knot sinks into the foam board. (Don’t pull too hard or you might yank it all the way through.) Now make sure you have some slack just like the wire on a regular picture frame. Cut the wire leaving enough room for a small knot and pull it into the foam board once again. When you hang your puzzle, the wire acts as a self-adjusting hanger - allowing you to balance the frame evenly.Lastly, grab a nail or any typical picture hanging hardware and finish hanging up your puzzle.
The Finished Product!
Ahh! The finished product! All of that hard work has paid off. Actually, gluing jigsaw puzzles is just not that hard, It just takes a little time and patience...for the glue to dry.
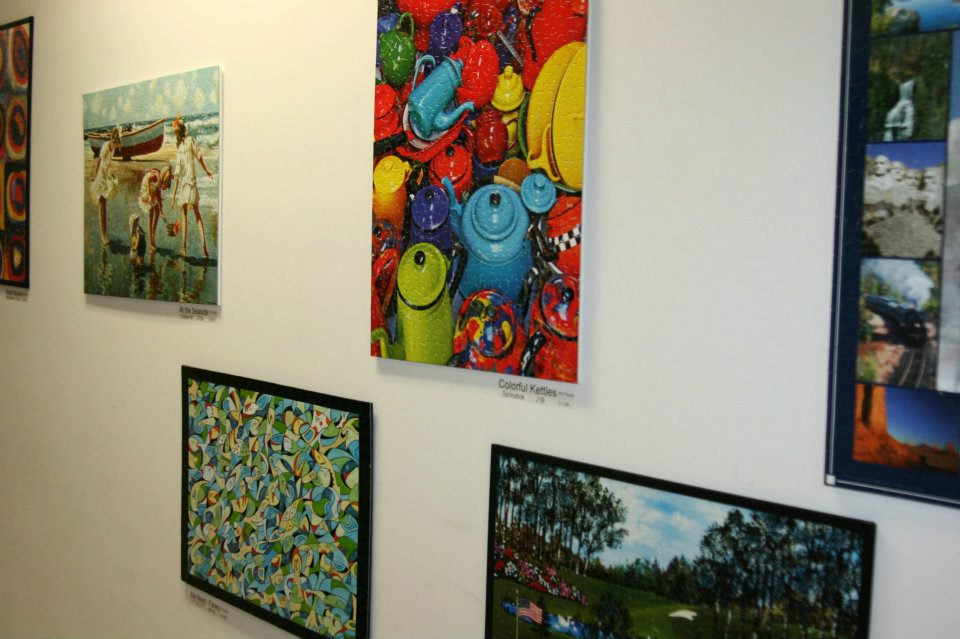
Above: One of our many walls of mounted puzzles hanging in the retail store.
FAQs and Tips
Do we have to use Glue? That is a common question. Gluing jigsaw puzzles is not for everyone! Many people just don't like glue! It can be a mess to deal with, if you are not careful! A company called Buffalo Games invented something called Puzzle Presto which is essentially contact paper made for jigsaw puzzles. You'll need to "flip" your puzzle, which goes a lot easier with a second pair of hands. One tip is to slide it onto a large piece of cardboard, and then place another large piece of cardboard on top (use parchment paper between the front of the puzzle and the cardboard to protect it if you want.) Hold the two pieces together tightly and flip it over. Removed the top piece of cardboard and voila! The puzzle is flipped! Once you have it flipped it is very easy to apply the Puzzle Presto.
Can I just use regular contact paper? We would definitely NOT recommend it since regular contact paper is very sticky and unforgiving! If you "goof-up" you will have a hard time trying to pull it up to re-position it. We think that gluing jigsaw puzzles is a great way to keep and display that favorite puzzle of yours!
What do I do if my puzzle is not flat after gluing it?
If the edges curl up somewhat after the glue has dried, try turning the puzzle over and brushing a coat of glue on the back side of the pieces. When this dries, it will usually pull itself flat again. Alternatively, if the entire puzzle is dry, you can cover the surface and place underneath any weighted flat object that is bigger than puzzle. After a day or so being pressed, it should stay flat.Can I glue any type of puzzle? Avoid using glue at all on metallic puzzle or puzzles that have high quality finishing (glossy, lenticular, glitter etc.) For these, we recommend using Puzzle Presto by Buffalo Games. This is an adhesive paper that is applied to the back of the puzzle and holds it together in preparation for mounting.